1911Forum banner

Hammer won't cock?

1 reading
4.3K views 21 replies 10 participants last post by  Chuck S  
#1 ·
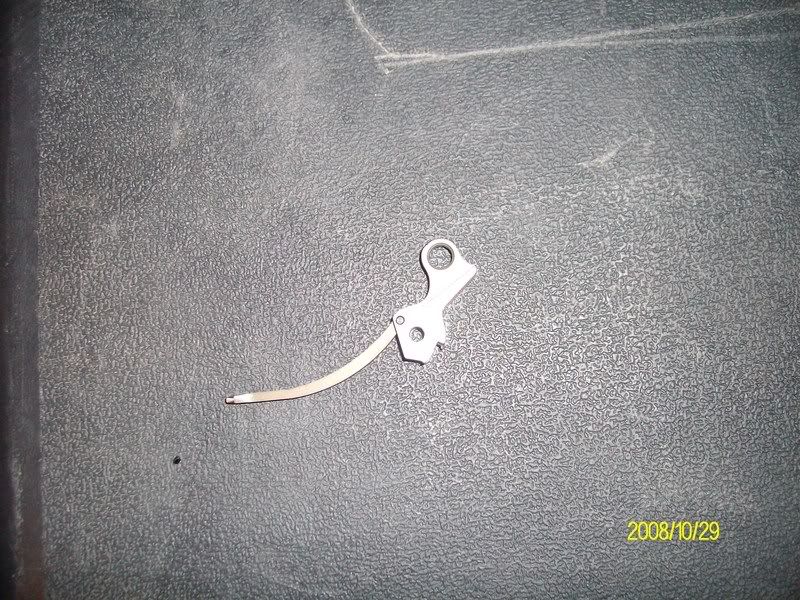
Installed this hammer and it wouldn't cock at all. I noticed it doesn't have the half-moon groove like the original one. Anyone else see anything wrong with it? This is my first 1911 and I'm still learning about it. The hammer came with a trigger kit, everything else fits but this.
Image
 
#2 ·
Is that the original hammer strut or a new one? Is your sear spring installed properly? ...Also what do you mean by "wont cock at all" hammer is frozen or just not catching in the notches?
 
#4 ·
Make sure on the sear spring first. Even though it worked fine with the stock hammer the leg for the sear could have slipped under it when you re-assembled with the new hammer.
 
#8 ·
Also, if the grip safety has no relief cut the burr hammer may be hitting the top of the grip safety, assuming that the original hammer was an original type. Perhaps a photo of the assembled gun could be shown?
 
#10 · (Edited)
You can't use a commander hammer with the GI or mil-spec GS as it hits it before going back far enough to cock. To see if this is correct assemble with out the GS and see if it doesn't cock then.

LOG

Relieve the obstruction of the GS or install a beaver tail GS.

LOG
 
#15 ·
A few minutes with a woodruff cutter in a mill would suffice to make clearance for the hammer. Of course, if the original GS is blued you have to refinish afterwards.
 
#19 ·
C&S trigger pull kits are mated. The hammer is mated to that sear. Replacing the hammer with another may not give you as smoooooooth a trigger pull. My suggestion would be to replace the GS with one that works. You should be able to get one used from someone. I recently did that.

Another option is to call C&S tell them the problem and see if you can return it for the Marine setup they offer. It has a spur hammer, I think.
 
#20 ·
Image


I did this mod on a friends Springfield when he wanted to fit a new hammer, sear, and thumb safety.

I used a dremmel with a large sanding drum to remove most of the metal, then finished with 320, 400, and 600 grit Wet/ Dry sandpaper. Degreased the part and applied some spray and bake finish. (Pardon the mismatch in finish of the thumb safety, hadn't done that prior to the pic.)